1.) Create a Windows Application and give it a preferred name.
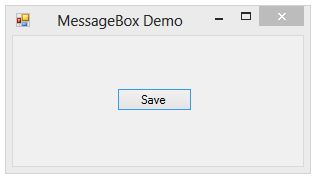
2.) Add a form to the solution and add a Button as displayed below image.
3.) Now double click the button and add following code snippet as displayed below.
private void btnSave_Click(object sender, EventArgs e)
{
  // get the result
  DialogResult result = MessageBox.Show("Hi, do you want to test messagebox buttons?",
  "MessageBox Buttons Demo", MessageBoxButtons.YesNoCancel, MessageBoxIcon.Information);
 if (result == DialogResult.Yes)
 {
    // if user clicked 'Yes' button
 }
 else if (result == DialogResult.No)
 {
   // if user clicked 'No' button
 }
 else
 {
   // if user clicked 'Cancel' button
 }
}
4.) Now press the "Save" button which shows below messagebox. You can changed the MesageBoxIcon either
MessageBoxIcon.Exclamation,MessageBoxIcon.Asterisk.5.) Based on the result Yes/No or Cancel modify your code to manage your application.
Download


Nice Blog
ReplyDeletebiztalk training
biztalk course
In a windows based application when a messagebox has yes no cancel buttons, it is easier for the users to interact with the software. Such instances are also beneficial when users are required to confirm activities or are presented with options. Just like in custom web application development at o16labs, the presence of distinct actions boosts the usability of the application and guarantees optimum selection.
ReplyDeleteGreat insight! This is a helpful reminder for anyone working on mobile app development in Bahrain. Running react-native android first really helps avoid the ‘Android project not found’ error. Thanks for sharing these useful tips!
ReplyDelete